Using Onboarding & Training Checklists
What are Checklists?
Checklists is a section of HR Partner where you can combine task items for Employees (and Admin Users!) to complete. Once you 'assign' a Checklist to an Employee, they are notified and required to complete the task items included in that Checklist. They can be used for many different purposes including Employee Onboarding, Offboarding, Training or even Policy Updates. In fact, the Checklists component means that you can essentially create your very own LMS (learning management system) for your employees right within HR Partner!
When using this section the most important thing to keep in mind is that you can create endless Checklist Templates for different of purposes. Within each Template are Checklist Items, which must be created first in order to assemble the Template. You may think of these Checklist Items as the "steps" or "tasks" within each Template.
You can assign a Checklist Template to one or more Employees, and reuse past Templates whenever you wish. You can also determine whether any individual Checklist Item should be viewed / completed by either Admin Users or Employees. Take Onboarding as an example - you may assign an Admin User with a task such as 'setting up a workspace' or 'setting up logins', which are all essential components of an Employee's Onboarding process, but do not need to be seen by the Employee themselves. While viewing the same Checklist, the Employee could have a restricted view which entailed things such as 'watch a health and safety video', 'complete a bank account form' or 'tell us how you like your coffee'.
Setting Up a New Checklist
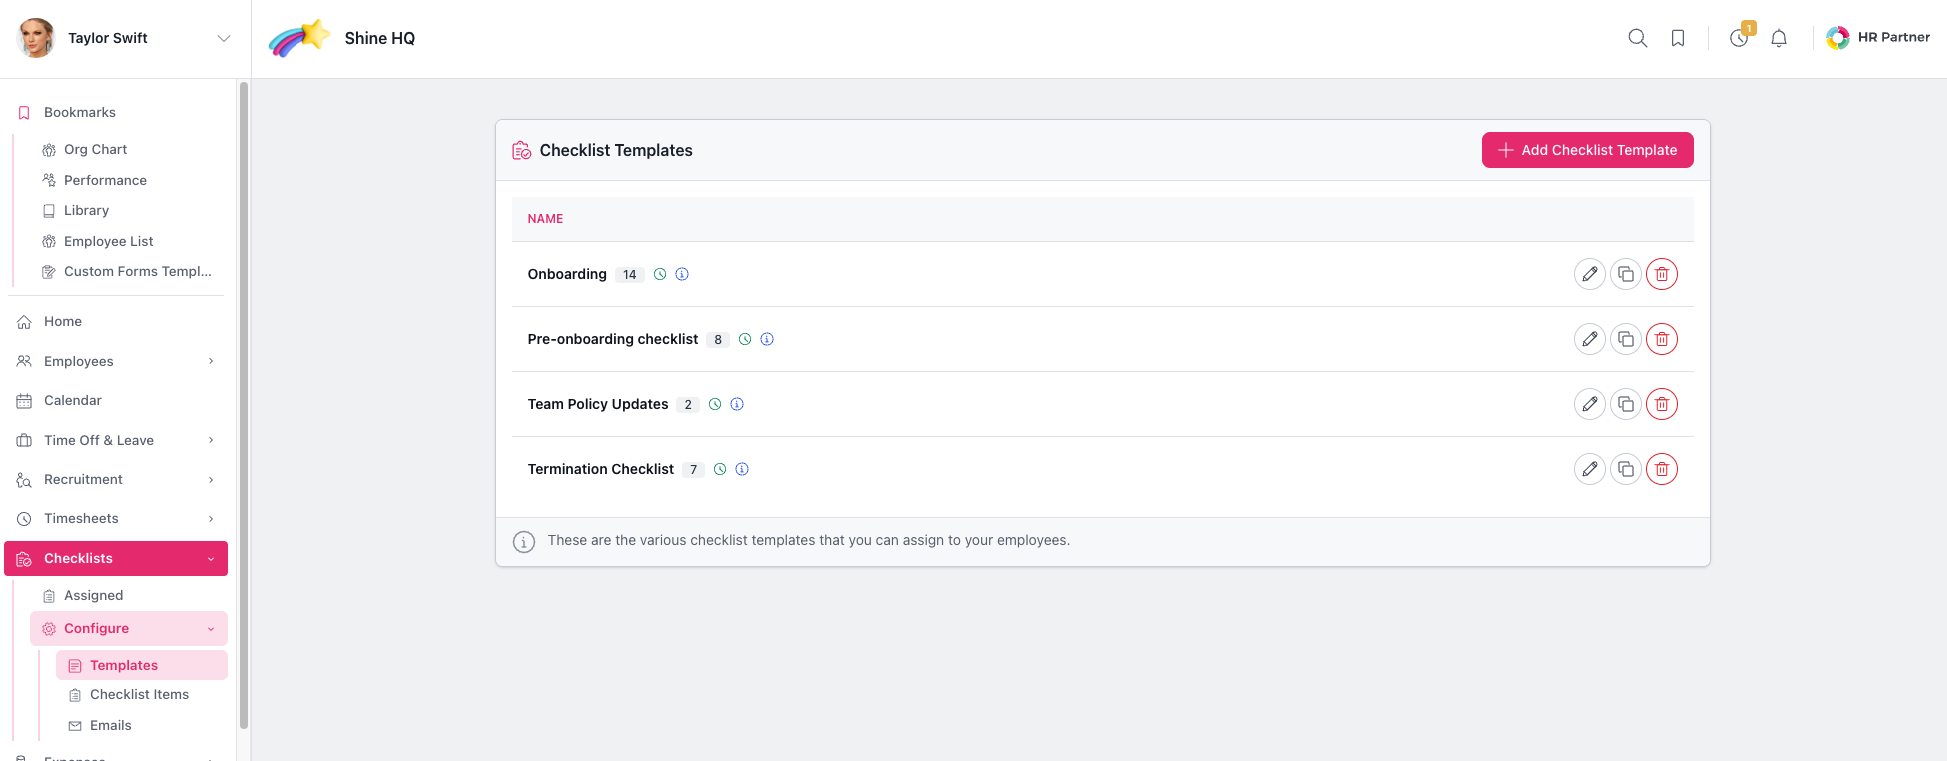
From your Admin User profile, go the main menu on the left side of the screen and select Checklists > Configure > Template then select the "Add Checklist Template" button on the top right.
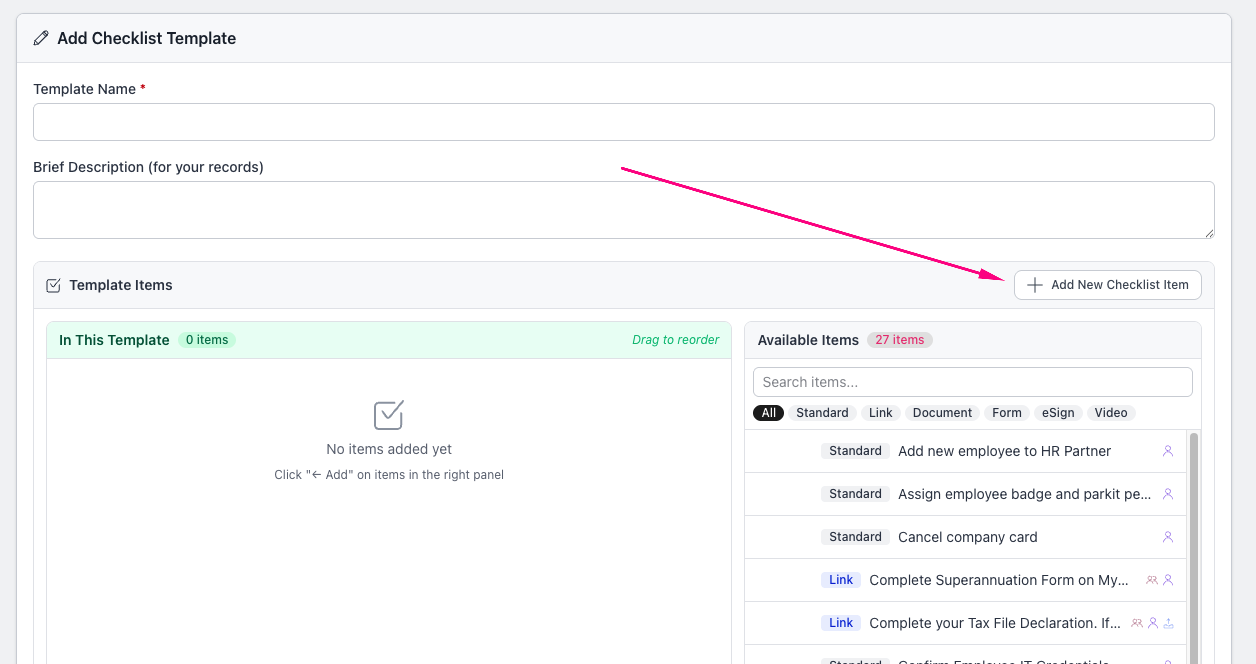
You will then see the screen below, which first asks you to name your Template and for a short description (for your own records). The next step is to start adding Items to your Checklist. Any previously used Checklist Items will appear greyed-out on the right hand side, for you to drag and drop over to the left, should you want to reuse them. To add a new item, click on the green "Add New Checklist Item Below" button as shown below:
When adding a new Checklist Item you are asked for a "Checklist Item Description", this name will be visible to those who are assigned to that particular item. As the screenshots below illustrate, you can select different "types" of Item rather than just standard check box items. You can also include links to external sites, library documents, e-Signature documents, video clips or links straight to Custom Forms within HR Partner. You then need to decide whether the item you have added is for the Employee or Company Admin and check the appropriate box before hitting the green "Save" button.

Assigning Checklists to Employees
Once your Checklist is setup, you can assign it to either one individual or multiple Employees. Again, go to the main menu on the left hand side of your screen and follow Checklists > Assigned . Click the green "Assign Checklist to Employee(s)" button on the top right of the list.
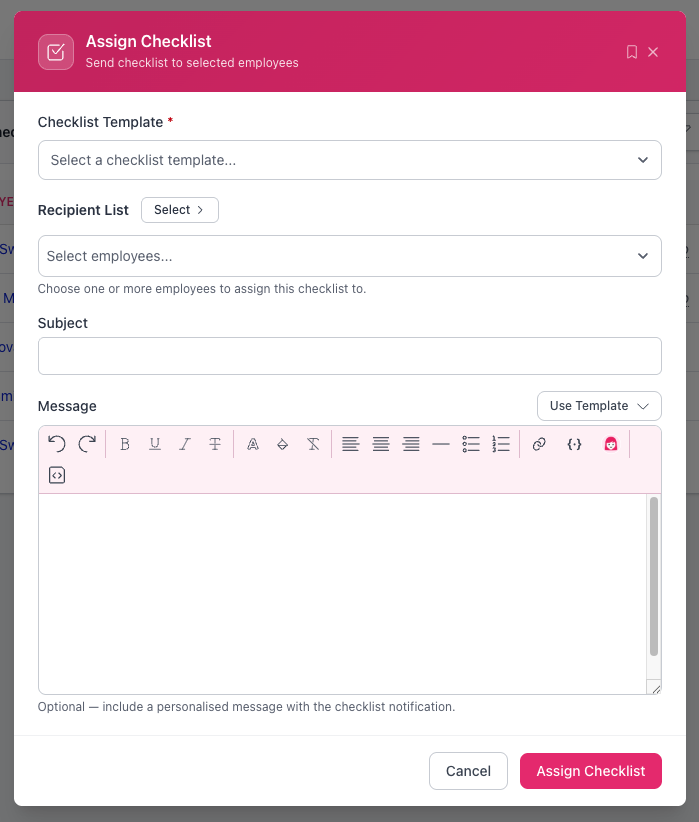
When the below screen opens, you can select the relevant Checklist Template from the dropdown, then type in the names of the employees you want to assign it to under "Recipient List". You then have a Subject line and a message text-area to complete for the body of the email you would like Employees to receive when they are alerted about the Checklist. They will be emailed a link to access the Checklist, so you can add a message like "Welcome to the company" or "Please follow these steps to complete your training." Once you're done, go ahead and hit the green "Assign" button on the bottom right.
Moving forward, if you'd like to view the progress or items within an employee's Checklist, simply navigate to Checklists > Assigned then click on the "Update" button beside the checklist you'd like to view.
Definitions
Checklist Item Types
- Checklist Item Description: The name of your Checklist item step. This is essentially the text of your Checklist Item that you will be able to reference.
- Standard Check Item: Your Checklist Item will be displayed as a text step.
- Link to External Site: Here you can choose to link to an external site as part of a Checklist Item step. For example, you might want to link to a training video on YouTube or your website, or link to documentation posted elsewhere.
- Video Clip: Ideal for company training videos. You can choose to embed videos from YouTube or Vimeo, or any video that has been uploaded to your HR Partner library.
- Electronically Sign a Document: You can link an e-Signature document from HR Partner such as an employment contract for the employee to sign.
- Fill out a Custom Form: You can link a Custom Form for completion, this can be useful to obtain things such as bank details.
- Download a Library Document: Select this option if you'd like to link to a document within your HR Partner company Library (which can be found on the left menu). This is ideal if you've uploaded an employee handbook or other company manual to the Library. That way, you can easily reference and display it in the Checklist Item, making it easier for employees.
Checklist Item Options
- Employee Must Check Off This Item: Check this box if the Item is for the employee to complete.
- Company Admin Must Check Off This Item: Check this box if the item is for an Admin User to complete. It is possible to check both of these boxes, if you would like an Admin User to double check what the employee has submitted.
The following options are found under "Advanced Settings" when creating a new Checklist Item
- Make This Item Visible to Employee: Check this box to make an item visible to employee (this must be checked if the employee is intended to complete the step).
- Require a File to Be Uploaded: Check this box if a file will be uploaded for the employee to complete or read. If you're an admin user and want to upload a file for them that is confidential like this, you can click on that employee's Checklist after it has been created and upload the file there for them to review.
- Make File Upload Mandatory: Check this box if you only want the employee to be able to check this step as complete once HR Partner has detected a file upload.
Checklist Notifications
When setting up Checklist Items, you can define whether or not you'd like to set automatic email reminders to Employees when a Checklist is late. For example, if you want an Employee to complete this Checklist no later than 8 days from now, choose "Remind in 8 days."
If you have any questions, feel free to use live chat after logging in, or email us anytime at support@hrpartner.io.